Ever wonder why your calves ache after running in a new pair of shoes even when they felt great in the store? That’s often the work of heel-to-toe drop, the difference in height between your heel and forefoot. It may sound like a small number (usually 0 to 12 mm), but it changes how your body moves.
A higher drop (8–12 mm) shifts impact toward your knees and hips, great for heel strikers and long runs. A lower drop (0–6 mm) puts more load on your calves and Achilles, encouraging a midfoot or forefoot strike. Switch between them too fast, and your legs will let you know with soreness that feels like you just discovered a new muscle group.
In this guide on how to group running shoes by heel-to-toe drop, we’ll break down how to group and rotate shoes by heel-to-toe drop so you can enjoy variety without the pain. You’ll learn how to pair similar drops, avoid overuse injuries, and build a smart rotation that keeps your stride strong and your recovery days easier.
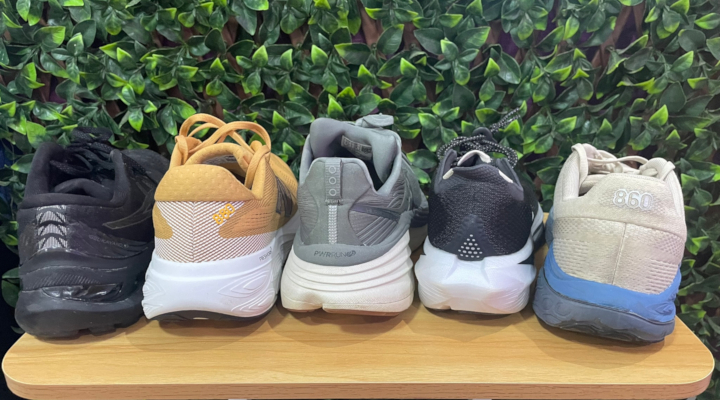
Table of Contents
- Understanding Heel-to-Toe Drop
- Why Grouping Shoes by Drop Is Important
- Safe Drop Ranges You Can Rotate
- How to Build a Balanced Shoe Rotation
- Transitioning to a New Drop Safely
- Tips for Long-Term Comfort
- Final Takeaway
Understanding Heel-to-Toe Drop
Heel-to-toe drop, often just called “drop”, is the height difference between the heel and the forefoot of a running shoe. It’s usually measured in millimeters, but even a few millimeters can change how your body handles impact.
High Drop
A high heel-to-toe drop (9–14 mm) tilts you slightly forward, putting more cushioning under the heel. This design shifts impact absorption higher up the kinetic chain, toward the knees and hips, reducing stress on the calves and Achilles tendon. It’s ideal for heel strikers who land first on the rearfoot or runners who struggle with tight calves, sore Achilles, or recurring lower-leg fatigue.
Because the heel sits higher, each step feels smoother and more forgiving, especially during long runs or recovery days when your form tends to break down. High-drop shoes often create a gentle rolling motion from heel to toe, making transitions feel effortless even when your legs are tired. For runners who prefer a traditional ride or want to take pressure off their lower legs, this setup delivers comfort and familiarity in every stride.
Mid Drop
A mid or moderate heel-to-toe drop (5–8 mm) strikes the ideal balance between comfort and natural mechanics. It provides enough heel cushioning for a smooth landing while keeping your foot closer to a level platform for better ground feel and efficiency. This range encourages a more neutral stride, somewhere between a heel strike and a midfoot strike, so no single muscle group carries all the work.
That balance makes it a great choice for daily training, easy runs, and recovery days. It keeps impact forces evenly distributed between your calves, knees, and hips, helping you maintain good form even when fatigue sets in. Most runners find this drop range the most versatile: stable enough for long runs, responsive enough for tempo work, and comfortable enough for walking or standing after a workout. It’s the “just right” zone that supports almost every running style without demanding a big adjustment.
Low Drop
A low heel-to-toe drop (2–4 mm) shifts the workload lower down the kinetic chain, engaging your calves, ankles, and Achilles tendon more with every stride. Because the heel sits closer to the ground, your foot lands in a more natural position, encouraging a midfoot or forefoot strike and a smoother, more efficient push-off. This setup helps improve ankle mobility, calf strength, and overall running mechanics, especially for runners looking to refine form or increase efficiency.
However, that extra engagement comes at a cost if you’re not used to it. The calves and Achilles take on more stress, so it’s important to transition gradually—start with short runs and alternate with your usual pair until your lower legs adapt. Once they do, you’ll notice a more connected feel with the ground, quicker transitions, and better control during faster efforts or shorter runs. For experienced runners or those with strong lower legs, a low-drop shoe can be a powerful tool to fine-tune stride and build durable, spring-loaded legs.
Zero Drop
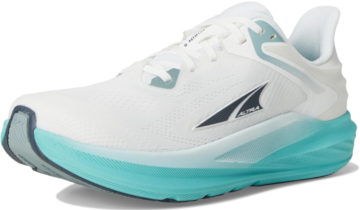
A zero-drop (0 mm) shoe keeps your heel and forefoot at the same height, no tilt, no pitch, just a perfectly level platform. It’s the closest thing to running barefoot, but with cushioning to soften impact. This setup encourages a completely natural foot strike, where your foot lands almost flat, promoting better balance and posture. Because your lower legs do all the stabilizing work, it builds strength in the calves, Achilles, and foot muscles over time.
But zero-drop shoes also demand respect. They require strong calves, mobile ankles, and good running form to handle the increased load. Transitioning too quickly can overwork the Achilles or leave your calves tight for days. When introduced gradually, though, they can help improve proprioception, stride efficiency, and overall running economy. Many runners use them for short, easy runs or strength-focused sessions to keep their mechanics sharp without overdoing it.
Understanding these categories helps you match shoes not just to your stride, but also to how your legs feel day-to-day. Because switching from one drop to another too abruptly is often the reason runners feel that “new-muscle soreness” after an otherwise easy run.
Why Grouping Shoes by Drop Is Important
If you’ve ever wondered why your calves light up after switching shoes, it’s not just the new foam or fit; it’s the drop difference. Grouping your shoes by similar heel-to-toe drops helps your body stay consistent in how it absorbs impact and pushes off the ground.
Each drop angle shifts which muscles work hardest:
- High-drop shoes unload your calves but place more demand on your knees and hips.
- Low or zero-drop shoes do the opposite, loading the calves and Achilles more.
When you jump between extremes, say, a 12 mm trainer one day and a 0 mm minimalist shoe the next, you’re asking your body to move differently overnight. That sudden change can cause tightness, soreness, or even minor strains.
Grouping shoes by drop allows you to rotate safely, giving your muscles variety without shock. It keeps your stride consistent, reduces fatigue, and builds resilience gradually. Think of it as strength training for your running mechanics, only smarter and less painful.
Safe Drop Ranges You Can Rotate
Not all drop differences are created equal. The key to avoiding soreness is to keep your rotation within a safe range, where your body doesn’t have to completely relearn its movement pattern each time you lace up.
A good rule of thumb: Keep your drop gap within 2–4 mm.
That’s enough variation to engage different muscles without shocking your calves or knees. Here’s how that looks in practice:
- High Drop (9–14 mm)
- Pair with: another high-drop or mid-drop shoe (7–9 mm range).
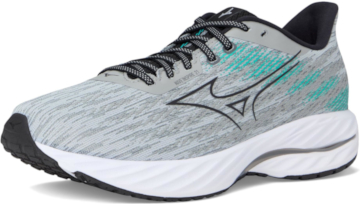
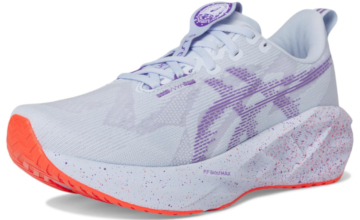
- Example combo: Mizuno Wave Inspire 21 (12 mm) ↔ New Balance Fresh Foam X 860v14 (8 mm) or Nike Vomero 18 (10 mm) ↔ ASICS Novablast 5 (8 mm)
- Why it works: both support heel striking and keep load off the calves.
- Mid Drop (5–8 mm)
- Pair with: low-drop (2–4 mm) or high-drop (9–10 mm) shoes for controlled variety.
- Example combo: Saucony Endorphin Speed 5 (8 mm) ↔ Hoka Mach 6 (5 mm)
- Why it works: offers variety in muscle activation while staying balanced.
- Low Drop (2–4 mm)
- Pair with: mid-drop (5–6 mm) shoes for smoother transitions.
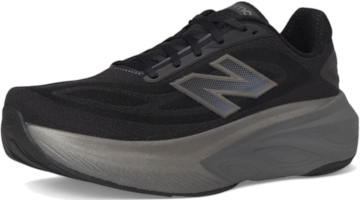
- Example combo: New Balance Fresh Foam X More v6 (4 mm) ↔ Brooks Glycerin Max (6 mm)
- Why it works: small difference, easy on the calves and Achilles.
- Zero Drop (0 mm)
- Pair with: low-drop (2–4 mm) shoes only after proper adaptation.
- Example combo: Altra Torin 8 (0 mm) ↔ Mizuno Wave Rebellion Flash 3 (3 mm)
- Why it works: builds strength gradually while protecting tendons from overload.
When your rotation stays within these boundaries, you’ll get the benefits of variety—muscle balance, improved resilience, less monotony—without limping around the next day wondering what went wrong. For the safest transition, aim for no more than a 2 mm difference in drop between pairs.
How to Build a Balanced Shoe Rotation
A smart shoe rotation isn’t just about owning multiple pairs; it’s about pairing them with purpose. When you group shoes by similar heel-to-toe drops, you allow your legs to recover while keeping movement patterns consistent. Here’s how to structure it:
Step 1: Start With Your “Base Shoe”
Begin your rotation by identifying your base shoe, the one that feels most natural to your stride and body mechanics. This is your anchor pair, the shoe that lets you run effortlessly without overthinking your form. It’s typically the model you reach for on daily runs, easy miles, or recovery days, when comfort and familiarity matter most.
Your base shoe should match your natural gait and preferred heel-to-toe drop, giving you a reliable point of reference when testing other pairs. Think of it as your home base: the shoe that tells you what “normal” feels like. Once you’ve found that dependable daily trainer, every other shoe you add, whether softer, lighter, or lower in drop should complement it rather than fight against it.
- Example: Saucony Ride 18 (8 mm) or Brooks Ghost 17 (10 mm)
Step 2: Add a Complementary Pair
Once you’ve established your base shoe, the next step is to add a complementary pair, something that feels familiar but brings a subtle twist. Look for a shoe with a slightly different heel-to-toe drop, ideally within 2–4 mm of your main trainer. That small change is enough to engage new muscles and vary your load pattern without throwing off your mechanics or causing soreness.
For example, if your base shoe has an 8 mm drop, try pairing it with something in the 5–6 mm range. The idea isn’t to reinvent your stride but to add controlled variety so your body becomes more adaptable and less prone to repetitive-stress fatigue. A complementary pair also lets you tailor your rotation to different runs, using your base shoe for easy or recovery days, and the alternate pair for tempo sessions or long runs when you want a slightly different feel underfoot.
It’s a small adjustment that can make a big difference in performance, comfort, and longevity, both for your shoes and your legs.
- Example: Pair your 8 mm daily trainer with a 5 mm rocker shoe like the Hoka Bondi 9.
- Benefit: You’ll engage new muscles without causing soreness.
Step 3: Match Each Shoe to a Specific Run
Assign shoes based on drop and purpose:
- High Drop (9–14 mm): Long runs or recovery days — less calf strain.
- Mid Drop (5–8 mm): Daily training — balanced load.
- Low Drop (2–4 mm): Tempo or speed sessions — more dynamic feel.
- Zero Drop (0 mm): Short runs or strengthening days — builds stability.
Step 4: Rotate Intentionally
Don’t just collect shoes; use them with purpose. The key to a healthy rotation is timing. Alternate pairs every one to two days so each shoe’s cushioning has time to rebound and your muscles experience subtle but meaningful changes in loading. Every shoe distributes impact differently, and by rotating regularly, you reduce repetitive stress on the same joints and tendons.
Think of it as giving your body micro-adjustments in training: one day your calves do a little more work, the next your knees and hips take on more of the load. This alternating rhythm helps prevent overuse injuries, improves recovery, and even extends each shoe’s lifespan.
If you run five days a week, avoid running in the same pair two days in a row. Instead, cycle through two or three shoes with slightly different drops or cushioning levels. You’ll notice your legs stay fresher, your stride feels smoother, and your shoes last longer, all from simply rotating with intention.
Example weekly flow:
- Mon: 10 mm high-drop (Brooks Ghost 17)
- Wed: 8 mm mid-drop (ASICS Novablast 5)
- Fri: 4 mm low drop (New Balance More v6)
- Sun: 10 mm high-drop again for long run
This approach gives you variety without pain, keeps your stride efficient, and extends the life of each pair. You’ll also discover which drop feels best on tired legs versus faster days, something every runner should know.
Transitioning to a New Drop Safely
Switching to a shoe with a different heel-to-toe drop can feel like meeting a new coach, motivating but demanding. The key is gradual adaptation so your muscles, tendons, and joints have time to adjust.
1. Ease Into It
When introducing a shoe with a different heel-to-toe drop, slow and steady always wins. Start by using your new pair for short runs or walk-run sessions, around 10 to 20 minutes, to give your muscles and tendons a chance to adjust. Your body needs time to re-learn the new angle and loading pattern, especially if you’re transitioning to a lower drop, which places more stress on your calves and Achilles.
During the first couple of weeks, alternate between your new shoes and your familiar pair. Gradually increase mileage in the new shoes, adding maybe one or two miles at a time, until you can comfortably complete a full run without tightness or soreness. Think of it as “teaching your legs” a new movement pattern rather than forcing one overnight.
Most runners start feeling natural in the new drop after two to three weeks, though it may take a little longer if the difference is large. The key is patience: small, consistent exposure builds strength, flexibility, and confidence, all without the burnout or strain that comes from rushing the process.
2. Keep Your Old Shoes in Rotation
Don’t retire your old pair right away. Alternate between your familiar drop and the new one. This helps your body adjust without overloading any muscle group. Think of it as easing between gears rather than slamming into a new one.
3. Strengthen and Stretch
Different drops load your body differently:
- Lower drops demand more from calves, Achilles, and foot muscles.
- Higher drops shift load upward toward the knees and hips.
If you’re introducing shoes with a new heel-to-toe drop, your lower legs will thank you for a little extra prep work. Add calf raises, ankle mobility drills, and gentle Achilles stretches to your weekly routine to help your muscles and tendons handle the change in load.
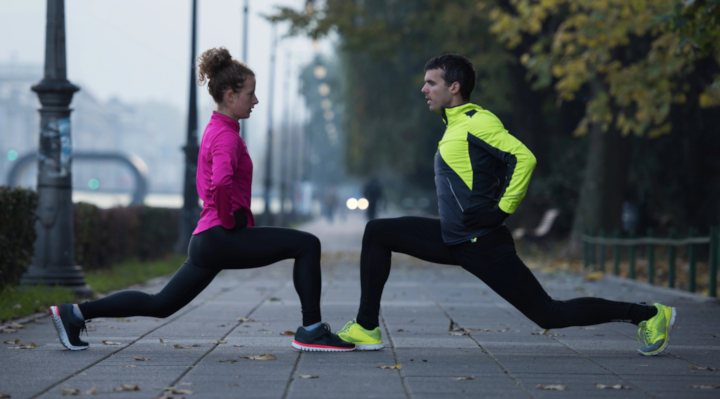
Simple strength work, like standing or seated calf raises, builds endurance in the calves and foot muscles that take more strain in lower-drop shoes. Mobility drills, such as ankle circles or dynamic lunges, improve your range of motion so you can land and push off more efficiently. And don’t skip the post-run stretches: a few slow Achilles or calf stretches can keep tightness from turning into discomfort.
You don’t need to go overboard, a few minutes, two to three times a week, is enough to build the resilience that lets you transition between shoe drops smoothly and stay injury-free. Consider it maintenance for the most important gear you own: your legs.
4. Listen to Your Legs
Your legs are great communicators if you pay attention. When adjusting to a new heel-to-toe drop, it’s normal to feel mild tightness in your calves, shins, or Achilles as your body adapts to the new mechanics. That kind of soreness usually fades after a few runs as your muscles strengthen and learn the new movement pattern.
But there’s a clear difference between normal adaptation and overdoing it. Sharp, localized, or lingering pain, especially around the Achilles tendon or the front of the shin, is your cue to back off. If soreness builds instead of improving, cut back mileage or switch back to your base shoe for a few runs until things calm down.
Think of your legs as feedback sensors: a little tightness means they’re learning, but persistent pain means you’re pushing too hard. Respect those signals, and you’ll adapt faster, stay healthier, and actually enjoy the transition instead of limping through it.
5. Be Patient
Adaptation takes time, and that’s perfectly okay. Switching to a new heel-to-toe drop isn’t a performance test; it’s a gradual recalibration of how your body moves and absorbs impact. Give yourself a few weeks to adjust and resist the urge to push distance or pace too soon. Your muscles, tendons, and joints need repetition, not rush, to learn the new mechanics safely.
As the days go by, you’ll start to notice small but encouraging changes: your stride feels smoother, transitions feel more natural, and your legs start handling different shoes without complaint. That’s the sign your body has adapted, and that your rotation strategy is working.
Once you reach that point, rotating between different drops becomes a powerful tool rather than a source of soreness. You’ll enjoy stronger, more resilient legs, better recovery, and a more balanced stride, all because you gave your body the time it needed to adjust. Remember: patience isn’t slowing you down; it’s setting you up to run longer, healthier, and pain-free.
Example: Practical Shoe Rotation by Drop
Here’s how a well-planned shoe rotation looks when grouped by heel-to-toe drop. Each category serves a purpose from protecting your legs on long days to keeping your stride lively on speed sessions.
| Category | Drop Range | Example Models | Best Used For |
|---|---|---|---|
| High Drop | 9–14 mm | Brooks Ghost 17 (10 mm), Nike Vomero 18 (10 mm), Mizuno Wave Inspire 21 (12 mm) | Long runs, recovery days, standing all day |
| Mid Drop | 5–8 mm | New Balance 880v15 (6 mm), Saucony Ride 18 (8 mm), Hoka Mach 6 (5 mm) | Daily training, easy runs, midweek mileage |
| Low Drop | 2–4 mm | Mizuno Wave Rebellion Flash 3 (3 mm), New balance Fresh Foam X More v6 (4 mm) | Tempo runs, light stability work, moderate effort days |
| Zero Drop | 0 mm | Altra Torin 8 (0 mm), Altra Paradigm 8 (0 mm) | Strength runs, short runs, mobility-focused days |
How to Mix Them
- Pair shoes within one category or with a 2–4 mm difference.
- For example:
- Brooks Ghost 17 (12 mm) ↔ Saucony Ride 18 (8 mm) → smooth transition.
- Hoka Bondi 9 (5 mm) ↔ On Cloudsurfer 7 (4 mm) → balanced feel with less calf strain.
By organizing your rotation this way, you’ll reduce soreness, extend shoe life, and feel consistently strong through every phase of your training week.
Tips for Long-Term Comfort
Once you’ve built a balanced rotation, keeping your legs happy comes down to consistency and care. Here’s how to make every pair go the distance—literally.
1. Rotate Regularly
If you want your running shoes to last longer and your legs to feel fresher, make rotation part of your routine. Switching between pairs every few days gives the midsoles time to fully rebound, something that doesn’t happen if you wear the same shoe day after day. Foam cushioning compresses with each step, and without rest, it gradually loses its bounce and support. Giving it even 24–48 hours to recover helps preserve its structure and responsiveness.
This rotation also gives your muscles and joints a break from repetitive loading patterns. Each shoe distributes impact differently, so alternating pairs helps prevent overuse soreness and small imbalances that can build up over time. It’s a simple, science-backed habit that can extend each shoe’s lifespan by 20–30% while keeping your stride feeling consistently smooth.
Plus, it just makes running more enjoyable; you’ll start to notice how each shoe complements a different kind of day: one for recovery, one for tempo, and one for when you just want to cruise comfortably.
2. Replace Shoes Before Cushion Breakdown
Even the best running shoes have a lifespan. Most pairs hold their structure and cushioning for about 300 to 500 miles, depending on the foam type, outsole design, and how you run. Softer, nitrogen-infused foams tend to lose their bounce a little faster, while firmer or dual-density midsoles can stretch that upper limit if rotated properly.
The real test, though, isn’t just mileage; it’s how your body feels. When a shoe starts to feel flat, less responsive, or unusually stiff, that’s a sign the midsole has compressed beyond recovery. You may also notice subtle warning signs: your legs fatigue sooner, your knees ache after runs that used to feel easy, or you start feeling new hotspots underfoot. That’s your body telling you the cushioning is done doing its job.
Retiring a pair at the right time isn’t wasteful; it’s preventive maintenance for your legs. Running on dead foam forces your muscles and joints to absorb more impact, which can lead to soreness or injury. Keep a rough mileage log or rotate multiple pairs to spread the wear, and your shoes (and legs) will thank you in the long run.
3. Listen to Subtle Feedback
Your body is constantly giving you feedback; it just speaks in whispers before it starts shouting. A bit of tightness in your calves, hips, or knees after switching shoes or drops is usually harmless. It’s your body adapting to a slightly new loading pattern, especially if the shoe geometry or cushioning feel different from what you’re used to. That mild soreness often fades after a few easy runs as your muscles and joints adjust.
But when that tightness turns into repetitive or pinpoint pain, it’s time to take it seriously. Persistent aches, especially in the same spot, are your body’s way of saying, “I need a break.” Don’t try to tough it out. Instead, rotate back to your base shoe, the one that feels most natural and neutral for you, and let your legs recalibrate.
Learning to read these small signals is one of the most valuable running skills you can develop. The earlier you respond, the faster you recover, and the less likely you are to end up sidelined. Remember: smart runners don’t ignore discomfort; they adjust before it becomes a problem.
4. Keep Shoes Dry and Fresh
Moisture is the silent killer of running shoes. When midsoles stay damp, the foam cells break down faster, losing both their bounce and structure. Sweat, rain, and humidity can slowly weaken the material, so it’s not just about smell; it’s about preserving performance.
To keep your shoes in top form, let each pair air out for a full day between runs. Remove the insoles if needed and loosen the laces so air can circulate inside. Avoid drying them in direct sunlight or using heat sources like hair dryers, which can warp the foam and glue. A shaded, ventilated spot is all they need.
And yes, there’s a bonus: fresher shoes smell more like effort and less like regret. Regularly rotating dry pairs not only keeps them feeling lively longer but also saves you from that moment of wondering whether the funk in your hallway is coming from your running habit or your shoes.
5. Strengthen and Stretch
Your shoes can only do so much, the rest comes down to the strength and mobility of your legs and feet. A strong foundation helps you adapt smoothly to different heel-to-toe drops, whether you’re switching from a 10 mm daily trainer to a 4 mm speed shoe or experimenting with a new rocker geometry.
Make it a habit to include calf raises, single-leg balance work, and mobility drills in your weekly routine. These simple exercises build endurance in the calves, stability in the ankles, and control through the foot arch, all key to handling drop variations without soreness. Think of them as preventive tuning for your body’s suspension system.
Don’t forget stretching and recovery work, too. Tight calves or stiff ankles limit your ability to land and roll naturally, which can turn even the best shoes into a discomfort trap. Gentle Achilles and soleus stretches, ankle circles, or short mobility sessions after a run go a long way toward keeping your stride smooth and pain-free.
When your lower legs are strong and flexible, switching between shoes feels effortless, and every stride, no matter the drop, feels more stable, efficient, and comfortable.

Final Takeaway
Rotating your running shoes isn’t just about style or variety; it’s about keeping your body balanced and pain-free. Grouping shoes by heel-to-toe drop helps your muscles adapt naturally and prevents those “why do my calves hate me?” mornings after a simple run.
Stick to a 2–4 mm drop difference between pairs, use each for its ideal purpose, and ease into new drops gradually. Over time, your legs will become stronger, more resilient, and better equipped to handle any distance or workout.
The result? A smoother stride, fewer sore spots, and a rotation that works with your body, not against it.
You may also like:
